How to set it up
Software Requirements
The following manual steps are only required at the initial system setup. All future updates and new installations of Pyra can be done with the Pyra Setup Tool.
OPUS and CamTracker
Our integration tests use OPUS 7.8.44 and CamTracker 3.9.2015.02.03. Both OPUS and CamTracker are not really available to download, but you will receive them when buying an EM27/SUN system.
More information on OPUS: https://www.bruker.com/en/products-and-solutions/infrared-and-raman/opus-spectroscopy-software.html
More information on CamTracker: https://www.imk-asf.kit.edu/english/896.php
Python 3.10
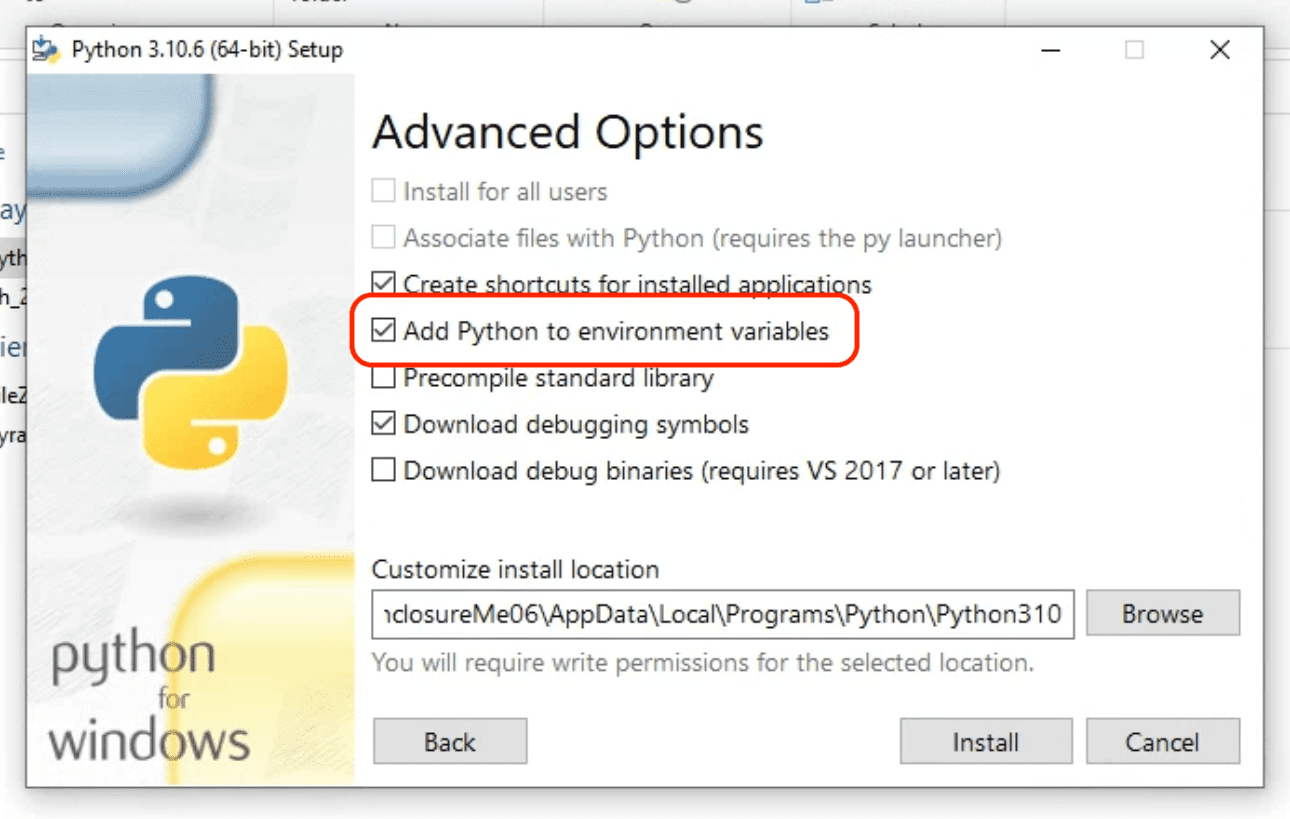
Your system's python3.10 interpreter should be available as shell environment variable python. Therefore, you need to add system environment variables to point the python command (and pip) to the Python3.10 interpreter by checking the box marked in the image below.
$ python --version
Python was not found; run without arguments to install
from the Microsoft Store, or disable this shortcut from
Settings > Manage App Execution Aliases.
$ python --version
Python 3.10.x
If your python command doesn't resolve to the installed version, please look at the section "Add Environment Paths" and add the path ".../Python310" and "Python310/Scripts" where you just installed Python.
Git, Curl, and Tar
git: https://git-scm.com/
curl and tar should be preinstalled on Windows 10 or newer.
Pyra Setup Tool
The Pyra Setup Tool can be used to install and migrate between Pyra versions. The tool looks for the "Documents" directory on your system and generates a directory structure like this:
📁 <DOCUMENTS DIR>
    📁 pyra
        📁 pyra-4.0.5
        📁 pyra-4.0.6
        📁 ...
The setup tool requires you to use a unix-like shell environment (bash/sh/zsh/..., not powershell).
On the first time, clone the setup tool repo and install its dependencies:
cd %userprofile%/Documents
git clone https://github.com/tum-esm/pyra-setup-tool
cd pyra-setup-tool
pip install .
Run the tool with (from this point on it will auto-update itself):
cd %userprofile%/Documents/pyra-setup-tool
python run.py
The setup tool automates the following steps:
- Download each release's codebase
- Install all python dependencies into the global python interpreter environment
- Download and runs the GUI installer
- Create desktop shortcuts to the
pyra-x.y.zdirectory - (Optional) Migrate the
config.jsonfile to keep the previous settings
The UI installer can take a while to finish. Please be patient.
Pyra CLI Command
You need to actively tell Windows about the pyra-cli command. When using the installer, it will tell you which path to add to the environment variables on every install process.

The edit of the path variable is only required once per Pyra computer - when setting it up initially.
Add Environment Paths
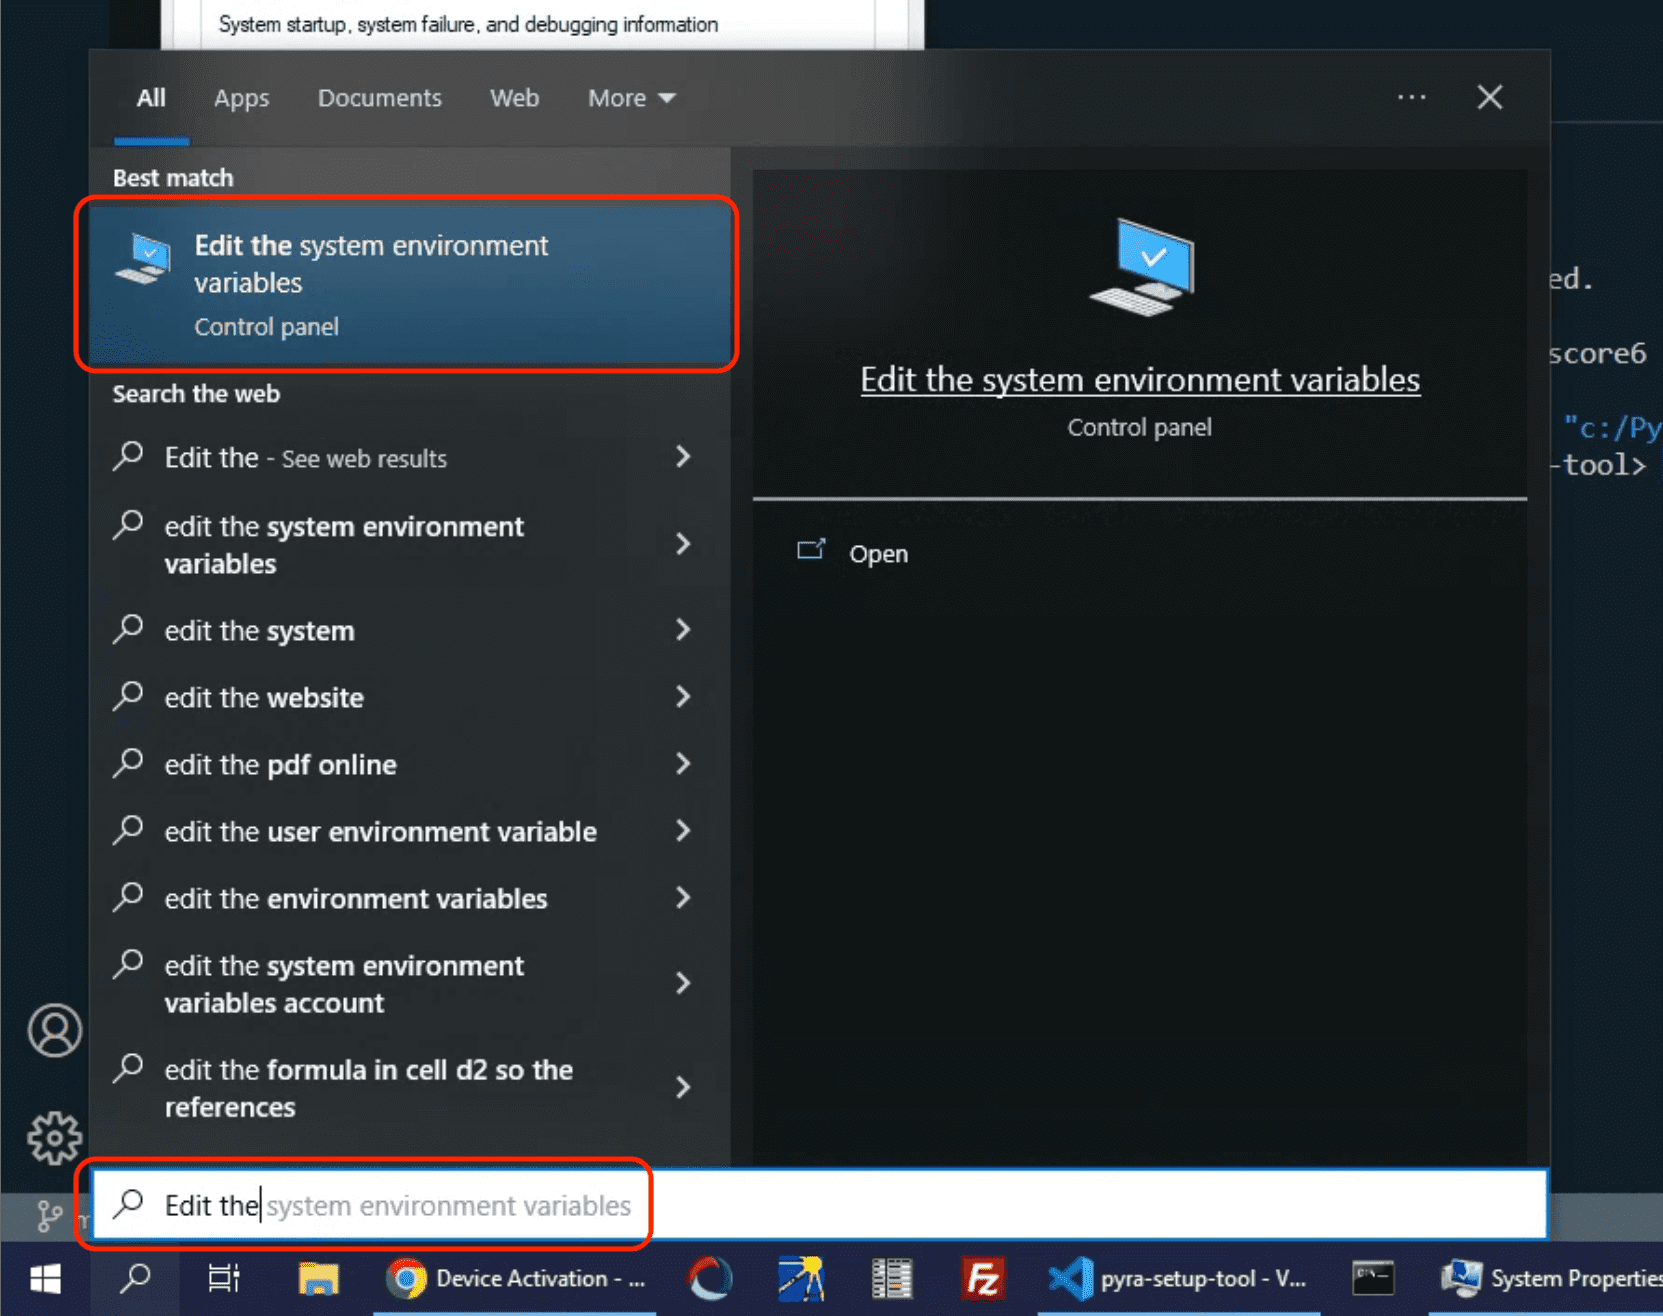
- Look for the "Edit the system environment variables" utility
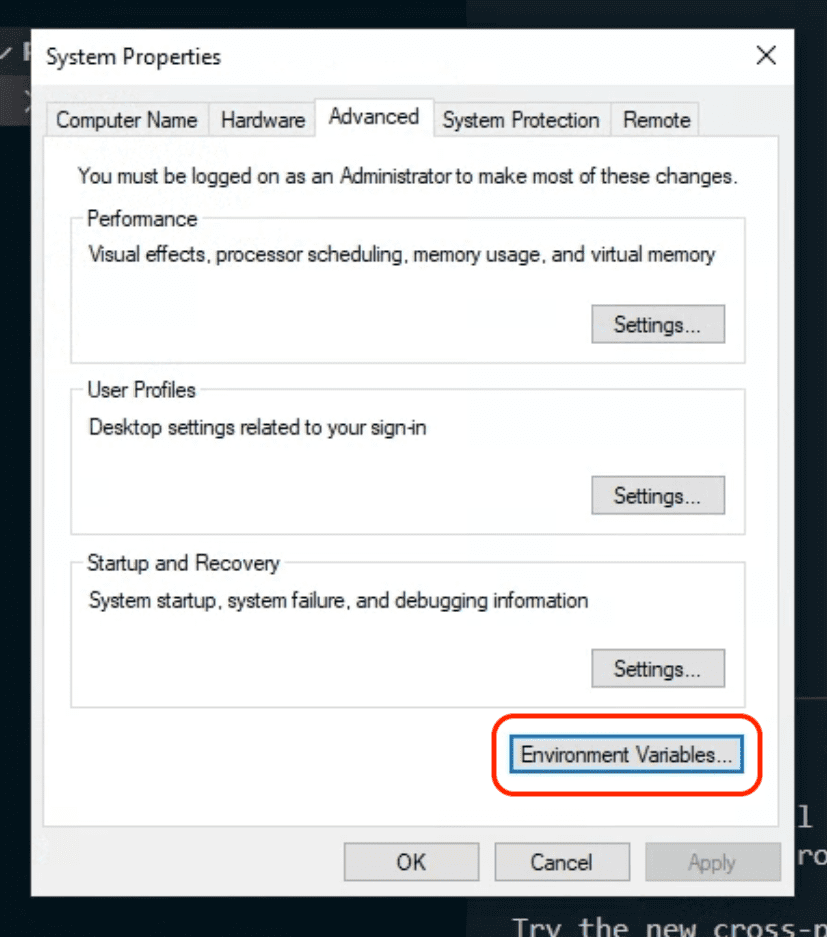
- Click on "Environment Variables"
- Select "PATH" in the system section and click on "Edit"
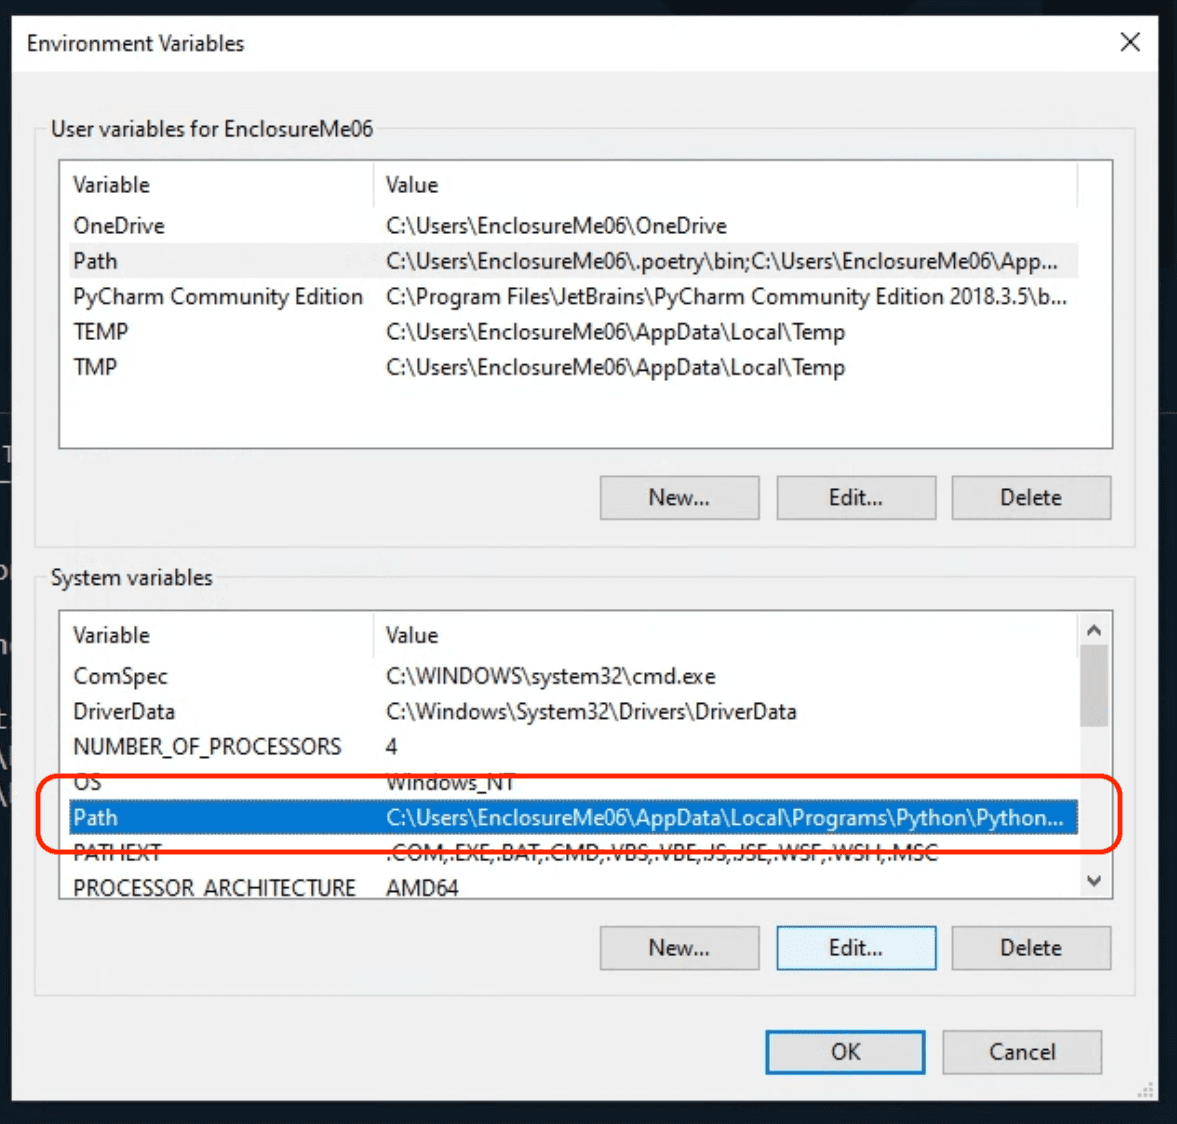
- Add the required paths to the list
Releases
All Pyra releases can be found here: https://github.com/tum-esm/pyra/releases. Please only use the releases starting with 4.0.5. Older versions are experimental.
Error Email Setup
For Pyra to send you error emails (see Usage section), you need an email account that allows this kind of connection.
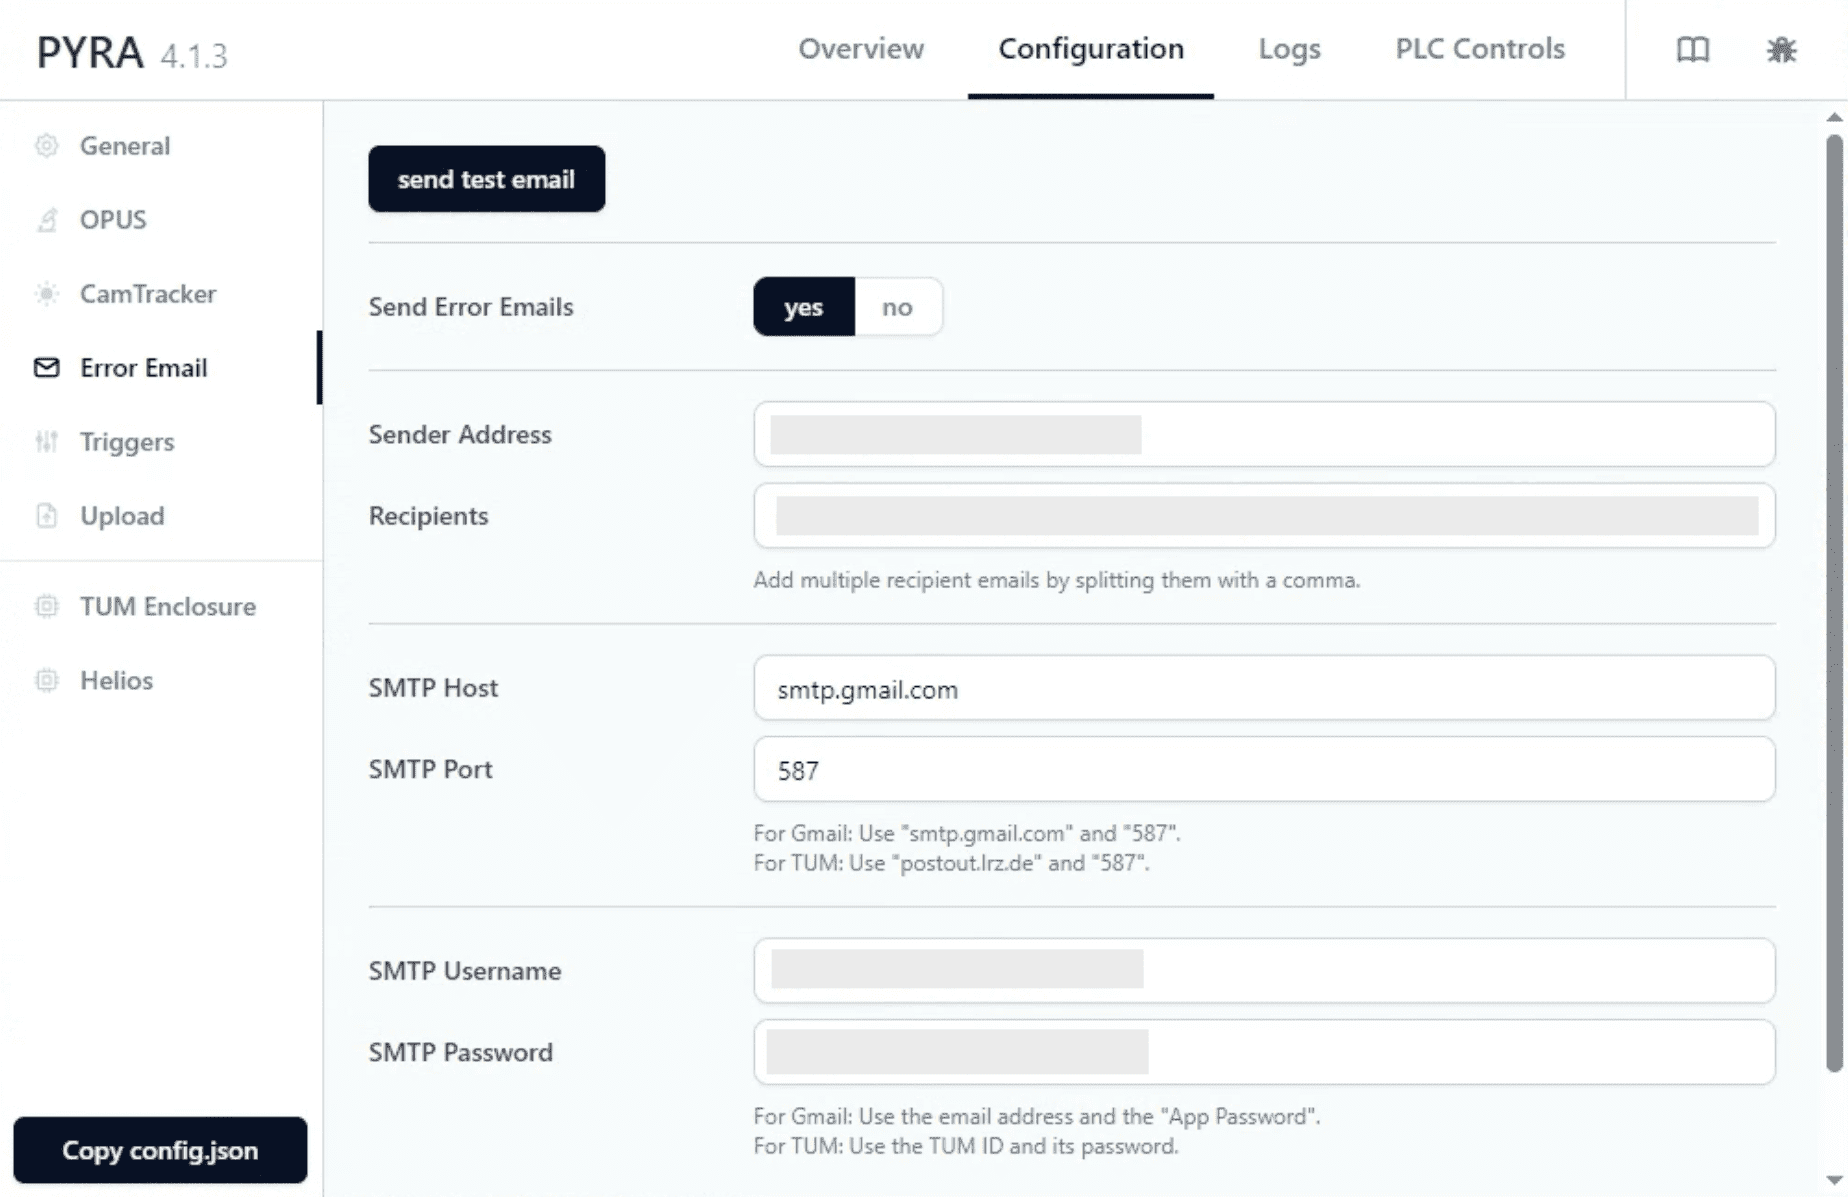
We recommend using a functional account from your university.
If you use Gmail, you have to use an "App Password" for Pyra, which requires 2FA for your Google Account. Please refer to this article on how to set up an "App Password": https://support.google.com/accounts/answer/185833.
The "Gmail password" and the "app password" are not the same. Whenever changing/resetting the "Gmail password", all "app passwords" will be invalidated.
Upload
You need a server running Linux that Pyra can connect to via SSH - using a password. The server has to have python3.10 installed.
In the config.upload section, you can set connection details, and source and destination directories for your interferograms. How the upload works is described here in detail.